Perfect Grilled Corn On The Cob

photo-3-8-001.jpg

Trim any loose husks from corn, and snip the tips to remove any parts that will be prone to burning or smoking. Do not pull husks away or remove silks from inside. There are some grilling methods that suggest removing the silks before cooking, however there are several reasons for leaving the silks intact for the cooking process. They are a natural source of nutrient-rich moisture and insulation that help keep the kernels from drying out under high heat. They also add flavor, but most importantly they are much easier to remove after the corn is cooked because the heat and steaming process cause the silks to stick to the husk, not the corn kernels. photo 1 (10)

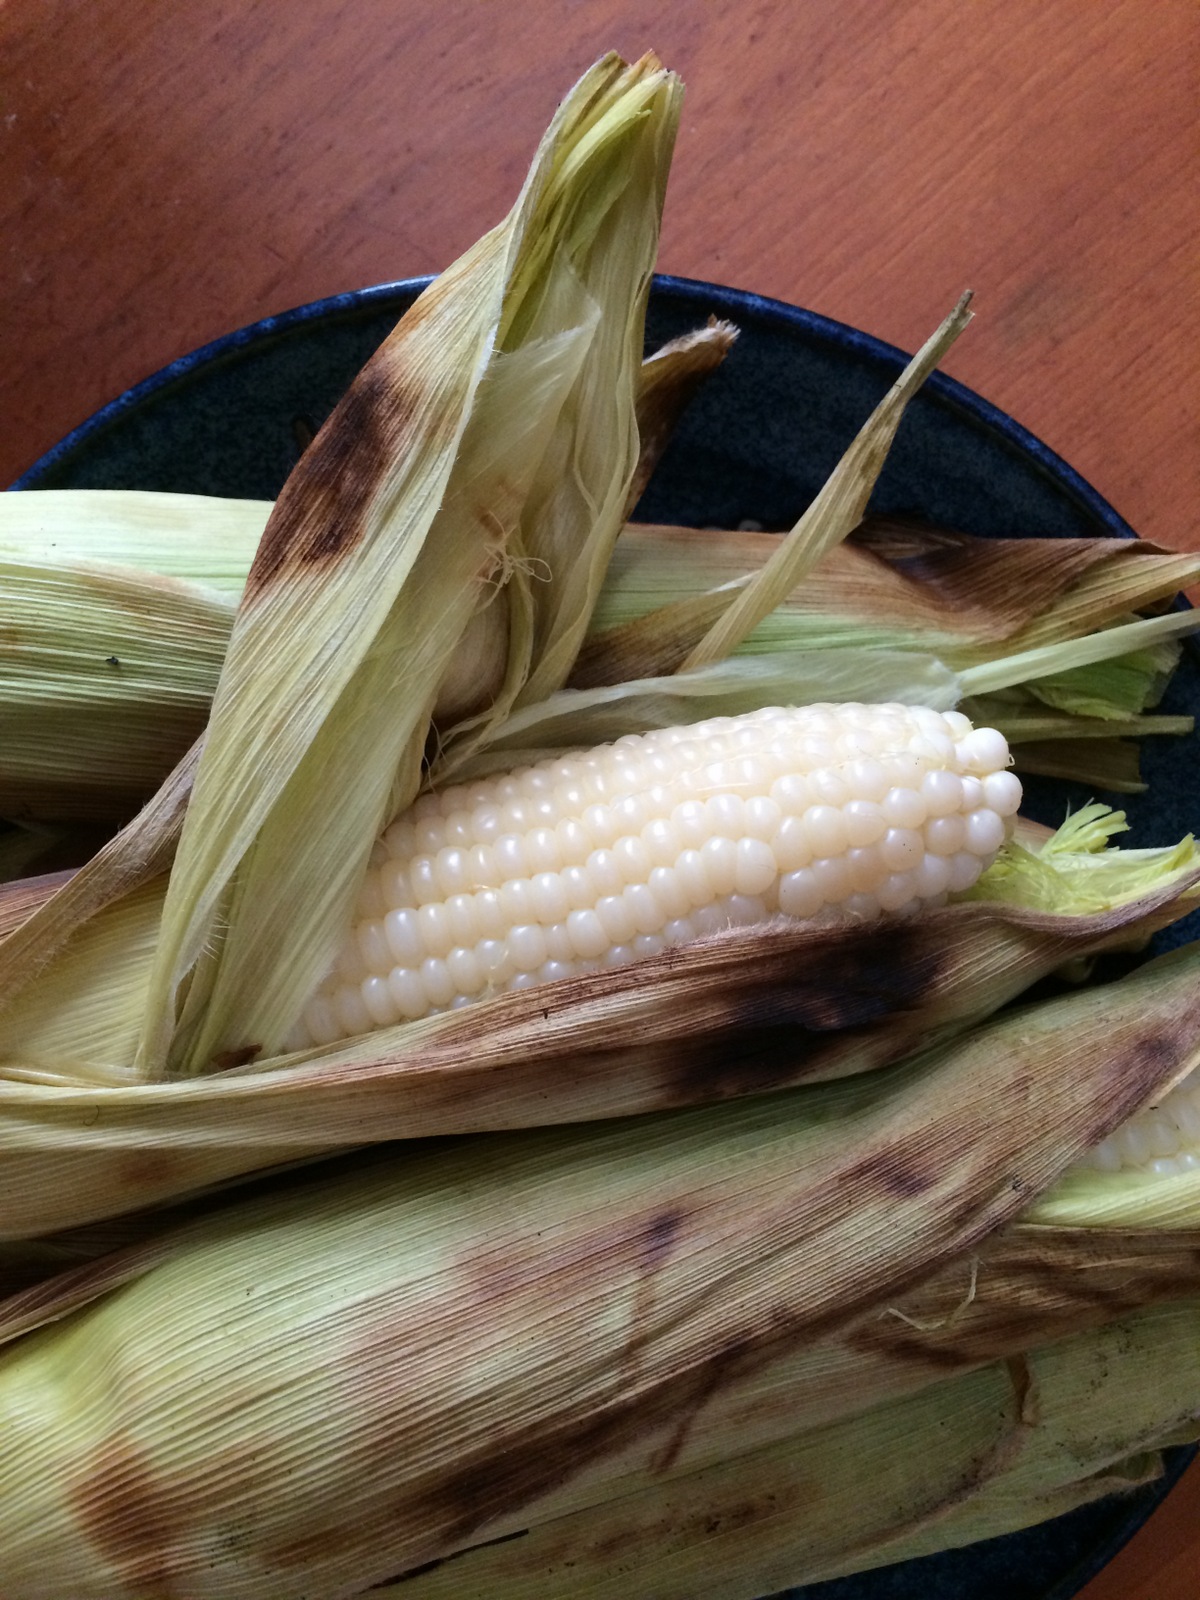
Heat grill to medium-high heat and place corn on the grill and cook with the lid closed.  Turn the ears a quarter turn every 5 minutes or so, or until the outer husks have started to turn black in spots. Keep turning the ears until they have cooked all the way around. Move less often if you like having a few charred kernels, or more often if you want the corn to steam until tender with no black spots.

photo 2 (8)

Once cooked, remove from the grill and let cool a few minutes, or until they are cool enough to handle.  To remove husks and silks, start at the tips of the corn. Grab one side of the silks and the husks at the same time and peel all the way down to the bottom (like peeling a banana). The silks should peel away cleanly with the husks.

To remove the husks from the cob once you have peeled all of the husks and silks, grab the bunch with one hand, holding the corn cob with the other, and break them off at the bottom of the cob.

For perfect summer flavor, serve with Toasted Garlic Drizzling oil and kosher or sea salt.

photo 5 (2)


Monster Sauce: AKA seriously tasty dairy and nut-free pesto sauce

IMGP1732.jpg

This is actually a recipe for pesto, minus the nuts* and cheese that make up the traditional sauce. But sometimes the name is everything for kids with developing palates. This is also a simple recipe that children could make with parent supervision! The bright green color and smooth texture perfectly complement crunchy raw vegetables, salads, meats, and pasta…especially those eaten by growing dinosaurs, super-heroes, robots, and monsters that also have fantastic imaginations.

Ingredients:

2-3 Cups fresh basil leaves

½ Cup olive oil

¼ Cup water (add more to thin if necessary)

Juice from ½ lemon

1 Tsp honey (optional)

2-3 Cloves of fresh garlic

Kosher salt, to taste

*For added protein, add a handful of raw green pumpkin seeds or nuts

Method:

Put all ingredients in a blender and puree until smooth. Adjust ingredients to taste.  Serve from a narrow tipped squeeze-bottle to let kids draw designs on their plates or decorate food with dots or stripes of sauce.

IMGP1505

Summer Slaw with Smoky Peach Dressing

IMGP1711.jpg

The Smoky Peach Dressing is really the highlight of this dish.  Yes, eat your veggies and all that. But the dressing...wow. It's versatile enough to keep around as a dipping sauce, sandwich dressing, marinade, etc. The Chattanooga Market is celebrating the season with it's annual peach festival this week, so we thought we'd join in the fun with this dish. Also, who could pass up using a dash of smoky Alchemy Spice Proud To Be American blend in honor of independence day?

Smoky Peach Dressing:

2-3 Medium peaches, quartered and pits discarded

5 Garlic cloves

1/4 Cup olive oil

Juice from 1/2 lime

1-2 tsp Proud To Be American spice blend by Alchemy Spice

1 tsp Lime Fresco Salt by Alchemy Spice

IMGP1703

Slaw:

Cabbage

Kohlrabi

Daikon radish

Fennel bulb

Summer squash (any variety)

Green onions

Kale

Juice from one lime

Kosher salt to taste

Method:

For the dressing, add all of the ingredients to a blender, blend until smooth and they emulsify into a creamy dressing.  Refrigerate until ready to use. If you have extra, place in a squeeze bottle and use as a dressing for sandwiches, grilled vegetables, hot dogs, and basically anything that tastes good with the addition of some spicy-sweetness.

Slaw is basically a quick salad of vegetables that are shredded or julienned, mixed together, and dressed.  It's not complicated. It's the stuff that picnics are made of...less time in the kitchen, and more time outside having fun.  The list of vegetables above are the ones in this week's CSA box, but you could substitute anything you like eating raw.  Grate, chop, slice and julienne the vegetables and mix together in a large bowl.  Toss the grated vegetables with lime juice and some kosher salt. Let rest a few minutes, then pour off any excess liquid. The vegetables will absorb a lot of the flavor of the peach dressing, so you may want to dress each portion of the slaw individually as it's served.

IMGP1718

Almond Zucchini Breakfast Muffins

IMGP1685-001.jpg

Ingredients:

2 Cups Sonrisa Farm stone ground whole wheat flour

1 Cup all-purpose flour

1 Tbs baking powder

1/4 tsp baking soda

1 tsp kosher salt

1  cup organic raw sugar

2 Cups ground almonds or almond flour

1 Cup sliced almonds (optional)

3-4 cups grated summer squash like zucchini, zephyr, or pattypan squash

4 eggs

1/2 cup pure maple syrup or local raw honey

1/2 cup unsweetened apple sauce

1/2 cup unsweetened, unflavored almond milk

1 Tbs pure almond extract

 IMGP1678

Method:

Preheat oven to 350 degrees.

In a large mixing bowl, combine the dry ingredients. Set aside.

In a medium mixing bowl, combine the eggs, maple syrup, apple sauce, and almond milk.

Pour the wet ingredients into the bowl with the dry ingredients.  Add the grated zucchini and stir until fairly even-textured.  Add the almond extract and stir to combine.

Line muffin tin with parchment muffin liners, or coat with oil or cooking spray.  Fill muffin tin with batter.  Bake for 25 minutes for mini muffins, or 30-40 minutes for large muffins. They are fully cooked when a toothpick or bamboo skewer comes out clean.  Let cool on a cooling rack before serving.  Cool completely before freezing.

Makes about 5 dozen mini muffins, or 30 large muffins.


Chocolate Beetroot Cake

IMGP1636.jpg

The original red velvet cakes were made with pureed beetroot or beet juice to deepen the color of a chocolate cake; not to mention the benefits of texture and sweetness coming from an economically grown vegetable. Butter and sugar have at times been rationed or expensive throughout history, but beetroot is easy to grow and readily available to most.  Cooking sweets with vegetables can also add fiber, vitamins, and minerals to a recipe, making them more nutritionally beneficial. This delicious chocolate cake is rich, smooth, and full of flavor.

IMGP1628

Ingredients:

1 Large or 2 medium (about 1/2 lb) beets

1/2 Cup Sonrisa Farm whole wheat flour (available at the Main St. Farmer's Market)

1/2 Cup all purpose flour

3/4 Cup cocoa

3/4 Cup sugar

1 1/2 Tsp baking powder

1/2 Tsp kosher salt, plus 1 pinch

3 eggs

One 3.5 oz dark chocolate bar (60% cocoa solids or higher)

1/2 Cup canola oil, olive oil, coconut oil, or melted butter

2 Tbs B&B liqueur, or a spiced brandy

Extra butter, sugar, & cocoa for dusting the cake tin

Fresh cream & liqueur for garnish

IMGP1614

Method:

Preheat oven to 350 degrees.

Prepare an 8 inch spring-form cake tin by coating with butter, shortening or oil. Then sprinkle granulated sugar all over the inside, followed by an even dusting of cocoa powder.

Wash beets, trim root and stems, and chop into chunks or wedges.  Place in a saucepan with enough water to cover.  Add a pinch of salt and a Tbs of B&B liqueur. Bring to a boil, then reduce heat and simmer on medium-low heat until the beets are tender.  Drain the liquid and puree in a blender until smooth.

In a large bowl, sift together the flours, cocoa, and baking powder.  Stir in the sugar and salt.

Break the chocolate bar into pieces and place in a pyrex jug with the oil or butter. Melt in the microwave and stir together.  Alternately you can melt them in a double-boiler over the stove.

Whisk together the eggs and beetroot puree

Combine the dry ingredients with the wet ingredients and mix with a hand mixer or stand mixer for 3-5 minutes, or until completely smooth.  Stir in a Tbs of the B&B Liqueur, then fill the prepared cake tin.

Bake in the center of the oven for 60 - 80 minutes, or until a skewer inserted into the center of the cake comes out clean.

Remove from the cake tin and let cool.

Serve with fresh cream spiked with Liqueur

IMGP1641