Quick Dill Pickles

Processed with VSCOcam with c1 preset

Ingredients:

4-6 small to medium cucumbers, thinly sliced

1 cup distilled white vinegar

2 cups water

2 tablespoons kosher salt

2 tablespoons sugar

4 teaspoons mustard seed

4 teaspoons black peppercorns

1/4 cup roughly chopped dill

8 cloves garlic, crushed

Processed with VSCOcam with c1 preset

Method:

Divide the cucumbers between 8 pint jars. Top each jar with 1/2 teaspoon mustard seeds, 1/2 teaspoon black peppercorns, 1 crushed garlic clove, and 1 1/2 teaspoons chopped dill.

In a large bowl, combine the vinegar, water, salt, and sugar. Whisk briskly until the salt and sugar is dissolved. Pour enough brine over each jar to cover the cucumbers completely. Cover tightly and refrigerate for at least 48 hours before serving.

Processed with VSCOcam with c1 preset


Tomato Jam

vscocam-photo-43-e1438217240389.jpg

Recipe adapted from epicurious.com 

Ingredients:

Makes 5 pints.

5 pounds tomatoes

5 cups sugar

big pinch of kosher salt

Method:

Bring a large dutch oven of water to a boil. Using a paring knife, cut out the stem end of each tomato, then slice a shallow X in the bottom.

Plunge the tomatoes into the boiling water until their skins loosen, about 30 seconds. Remove them with a slotted spoon and let cool. When cool enough to handle, slip off their skins. Discard the water, but save the dutch oven for cooking the jam.

Halve the tomatoes at their equator and gently squeeze out the seeds and juice. Reserve the seeds and juice for another use. Cut the tomatoes into 1/2-inch pieces.

Return the tomatoes to the saucepan and stir in the sugar and salt. Cook over medium heat, stirring frequently to ensure that the mixture is cooking evenly, until most of the liquid has cooked off. If foam occasionally rises to the top, skim it off with a large spoon. Remove from the heat.

Ladle the jam into clean jars. Cover tightly, let cool, and refrigerate.

Jam will keep in the fridge for 6 months or can be canned and preserved indefinitely.

Serving Suggestions:

  • Spread crostini with goat cheese and top with jam
  • Serve alongside a collection of local cheeses and toasted nuts for a seasonal twist on a cheese plate
  • Serve with buttermilk biscuits and fresh butter

Chattanooga Style Pizza

Western Civilization's Favorite Food: (Chattanooga Style)

Making local, farm-to-table pizza with a year's-worth of CSA bounty.

Italy of course, but also New York has it, Chicago has it, San Francisco has it, and many other locations around the world have claims to pizza flavors that are worth travelling for the experience. So what is the "Chattanooga Style Pizza?" We aren't big-time yet, but let's suppose we have some potential for developing a "worth-the-travel" flavor as well. There are some fabulous pizza's on Chattanooga's restaurant menus, many of whom source locally produced ingredients. And with regional agriculture growing and developing, even Chattanoogans who don't own restaurants have enough access to the best quality local produce, meats, cheeses, and grains to fill our pantries, refrigerators and freezers with prime ingredients.

Pizza is (essentially) whatever you like to eat served open on bread, and even the bread part is open for interpretation. Nevertheless, the basic components of the popular comfort food we call pizza are: crust, sauce, and toppings. Arguably, the type of oven and temperature in which a pizza bakes could also be at the top of the list for basic components of good pizza. So if you can, bake on a hot pizza stone in a very hot oven (around 500 degrees), or in a wood-fired oven. If you don't have access to this sort of heat power, any oven will do; you just may need to play with ingredients and temperatures to suit your oven, or pre-bake your crust to avoid sogginess.

And here are a few ideas for building your own perfect Chattanooga Style Pizza:

Fresh pizza crust is essential.  Store-bought pizza crusts are tough and flavorless, so if you are serious about making good pizza it's a great idea to start with a good recipe for yeast or sour-dough pizza crust. For a soft, thicker crust try this one: Quick Pizza Dough

If you like a thin, crispy crust and have a sour-dough starter, try this sourdough pizza crust recipe, with more on how to make the pizza here.

IMG_2505

A great party idea, or to get kids involved, is to use cake tins for personal pizzas. This is also a great way to make several different pizzas. Most ovens will hold around six 9-inch tins.

IMG_2502

The sauce is often regarded as a compulsory ingredient on pizza, with jars of "everything-tastes-the-same" blindly opened and spread without any further thought. But freshly made marinara from whole tomatoes can add transforming flavor. Here's an easy recipe:

1) Quarter several whole tomatoes, discarding cores, and place in a blender or food processor. Pulse until they are like a textured sauce, but not pureed.

photo 2 (10)

2) Place the tomatoes in a heavy stew pot or in a slow cooker. Add a generous amount of crushed or minced fresh garlic (about 1-2 cloves per tomato), some dried herbs (like herbs de Provence), a bay leaf, a generous splash of red wine, olive oil, and season to taste with kosher salt and pepper. Add fresh or dried cayenne pepper if you want a little heat in the sauce.

3) Let the sauce simmer for several hours with the lid of the pan tilted to allow the steam to release. Stir occasionally. The water in the sauce will reduce and the flavors will become more concentrated the longer it cooks.

photo 1 (12)Pizza toppings can include all-local ingredients from your CSA share and other vendors from your farmer's market.  All your hard work putting away extras will bear fruit as you use them to make the perfect pizza. Caramelized onions, pickled corn, roasted peppers, frozen beet greens, pickled banana peppers, pesto, fresh tomato marinara, and local cheeses from Sequatchie Cove Farm are ready to top a truly Chattanoga Style Pizza. Other ingredients like teriyaki marinated chicken, grilled meats, sausage, or local pepperoni from Main Street Meats are delicious proteins to add on top.


IMG_2510

Try these combinations, or create your own unique flavors:

1) Marinara, chopped beet greens, roasted sweet peppers, pickled corn, pickled banana peppers, smoked sausage, Sequatchie Cove Farm Coppinger Cheese.

2) Marinara, greens, pickled corn, pesto, Main Street Meats pepperoni, Cheddar Cheese.

3) Pesto, caramelized onions, roasted sweet peppers, grilled teriyaki chicken, beet greens, Sequatchie Cove Farm Yetti Cheese.

4) Pesto, caramelized onions, pickled banana peppers, pickled corn, Sequatchie Cove Farm Yetti Cheese.

photo (17)


Fire Roasted Peppers

IMGP9839.jpg

Roasted sweet peppers are a commonly found for sale in jars or cans for about $6/16oz.  Organic roasted peppers can be even more expensive.  Making your own fire-roasted peppers, however, is exceedingly easy and inexpensive.  Preserving is easy by canning them in jars with water and citric acid, or just pack them in freezer-proof containers and freeze portions for the winter. I used a hot barbecue grill for this recipe, but you can hold them over an open flame on your gas range, or on a baking sheet under a broiler.  The main point is to use high heat to blacken and blister the skins of the peppers.  This flavors the meat of the peppers, while also allowing the skins to separate easily for removal.

Here's how:

Heat grill to a high heat (about 550 degrees) Place red, yellow, or orange sweet peppers on the grill, turning to blacken all sides.

IMGP9824

Remove from heat and immediately place the peppers in a plastic or paper bag. Alternately you can put them in a bowl with a lid.  Allow the peppers to steam for a few minutes, or until they are cool enough to handle.

IMGP9829

When the peppers are cool enough to handle, gently rub the skins away from the peppers and discard.  Remove seeds and stems as desired.  Use in recipes, or freeze.  Let cool completely before freezing.

IMGP9839

Pickles: Raw, Fermented, and Cooked

IMGP9624.jpg

Earlier in the season I posted a recipe for basic kimchi.  Perhaps it's not what immediately comes to mind when you hear the word "pickle," but pickle it is. For thousands of years people have been pickling foods through the process of fermentation. The basic principle is to salt food (or soak in a salt brine), store anaerobically (without the presence of air), and leave at room temperature long enough for the lactobacillus bacteria to kill off any unhealthy bacteria.  In this natural process of preserving perishables, a host of B-vitamins are produced, and the sour taste is an added bonus. At some point in history, vinegar (also a fermented product) became a main component in modern pickling. Most pickled vegetables in grocery stores have been processed with vinegar.  The reason for this is that the 5% acidity in vinegar is enough to reliably and consistently kill off bacteria and anything else that would produce a food borne illness.  The downside is that vinegar inhibits the growth of probiotics as well.  Heat processing, or canning will further reduce the natural vitamin C content, but allows food to be preserved safely for years.

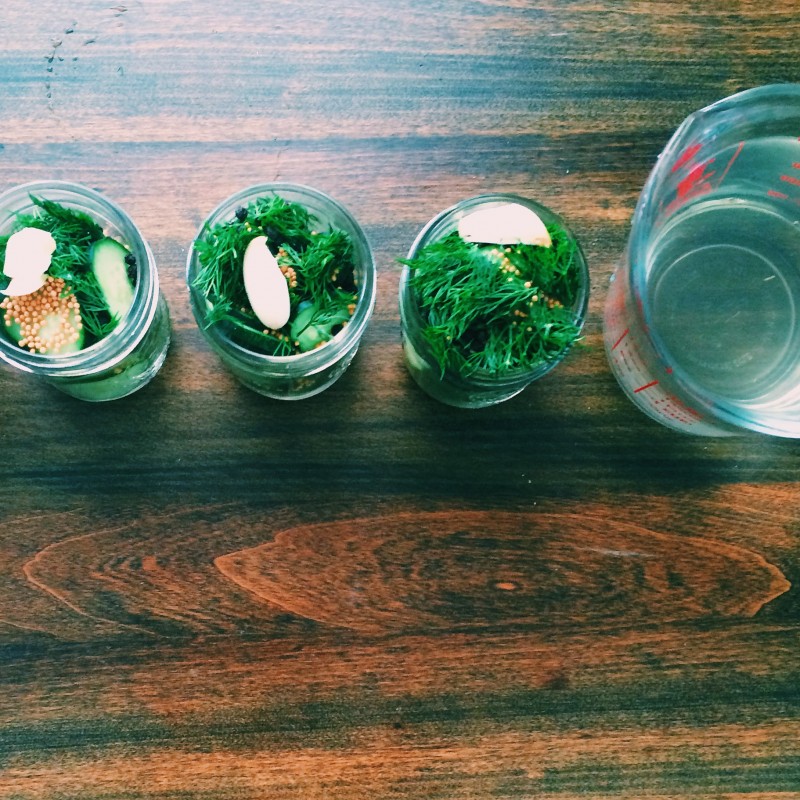
We have used cucumbers, beans and corn, but you can try any of the methods with squash, peppers, or your favorite vegetable. If you are curious, and would like to do some experimenting of your own, here are three methods of pickling vegetables for you to try:

Method 1: Easy Dill Pickles by Chop Chop Magazine

(Click link above for the recipe)

This method uses the process of fermentation, while also using vinegar for flavor and faster pickling.  The vinegar inhibits the growth of  bacteria, so the fermentation will not be as active as a salt-only method.  However a benefit to this method is that because the cucumbers are never cooked or exposed to heat processing, the natural vitamin C content is preserved.

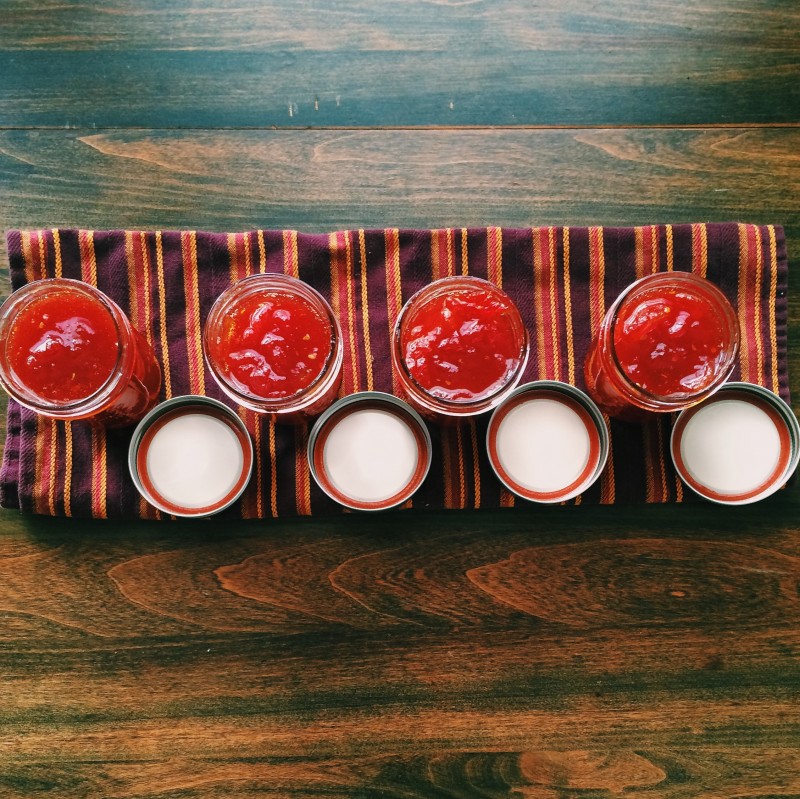
Method 2: Dilly Beans

This Method uses a traditional salt and vinegar brine and water bath canning for long-storage preservation.  The benefit of this method: Once canned and sealed, the jars of food do not require refrigeration and can be stored safely for years.  The downside is that much of the natural vitamins are reduced in the heat-processing. Nevertheless, these pickled beans are delicious!

Ingredients (for one quart of beans):

1 lb green beans, washed, stem end trimmed, and strings removed

1 Cup vinegar (5% acidity)

1 tsp kosher salt

1-2 Cloves of garlic, peeled

5-6 black peppercorns

1 Yellow cayenne hot pepper

3 Sprigs of fresh dill leaves, or one seeded dill flower head

Method:

In a 12-quart sized stock pot with lid and rack (a small aluminum disc with holes for raising jars slightly off the bottom surface of the pot), or water bath canner; boil about 10 quarts of water.  Have a second pot of boiling water available for topping up when you are ready to seal the jar.  Sterilize a quart-size mason jar and lid (wide-mouth is easier for this recipe).

Place the salt, cayenne hot pepper, garlic clove, peppercorns and dill in the bottom of the jar.  Pack the beans in the jar as tightly as possible.  You can stand them all upright if they are whole, or cut them into pieces.  Combine the vinegar and water in a small saucepan and boil. Pour the vinegar and water mixture into the filled jar, leaving 1/2 inch head space. Place lid and band on the jar, tightening to fingertip tight.

Using a canning jar lifter, place the jar of beans into the large pot of boiling water.  Top up with enough boiling water to cover the jar of beans entirely.  Place lid on the pot of boiling water and set timer for 5 minutes, (10 minutes if you are at an elevation of 1,001 ft or greater above sea level, 15 minutes if above 6,000 ft).

Once processing time is done, carefully remove jar with the canning jar lifter and place it on a cloth.  Let cool completely before checking that it is sealed.  Remove band and wipe away any moisture. Store in a cool, dark place for at least 6 weeks before opening and tasting.

Method 3: Pickled Beans and Corn

This is a traditional salt brine fermentation.  The corn and beans are blanched before brining to make the texture a little softer, but that step is not required.  This method makes the most of the natural pickling process.  Lactobacilius bacteria (present in the vegetables), converts sugars into lactic acid, which preserves the vegetables.  This process also produces B vitamins, while also preserving Vitamins C and A that are at their highest in raw vegetables.

Ingredients:

1 lb of green beans, ends and strings removed, cut into 1-inch pieces

2-3 Ears of sweetcorn, shucked and silks removed

2 Garlic cloves

2 Yellow cayenne hot peppers (dried or fresh)

4 Tbs pickling salt

Method:

Clean two quart-sized canning jars and their lids and place a clove of garlic and a cayenne pepper in each clean jar.  In a large bowl combine two quarts of water and 4 Tbs of pickling salt. Set aside.

Boil a large pot of water.  Place ears of shucked and cleaned corn into the water for about 1-3 minutes to blanch (depending on how soft you like the corn), but not too long. You don't want to kill the good bacteria inside the corn kernels.  Remove the corn from the boiling water and dunk it into a bowl of ice water until cold.  Next place the beans in the boiling water for about 30 seconds, or until they turn bright green.  Remove beans from the boiling water and place them in the bowl of ice water until cool.  Drain.

Cut the corn kernels off the cob.  Place the beans and corn kernels in the bowl of salt brine.  Mix and let rest for about 15 minutes.  Using a canning funnel over each jar, scoop the beans and corn out of the brine solution and fill the jars snugly, leaving an inch or two of space at the top.  Pour some of the brine into each jar until the beans and corn are completely covered.  Place lids on the jars and store at room temperature for 1-6 weeks.  Open the jars every day or so to check that they are fermenting and to press the beans and corn back down into the brine.  You can taste along the way to see if they are sour enough.  Once they are done to your liking, you can eat right away, or store the jars in the refrigerator for several months.