Tarte Normande and Apple Custard Tart

IMGP0162.jpg

Cuisines that define cultures may seem to be a constant in the myriad of changes over time.  There are family and cultural favorite recipes that are passed down for generations, but often substitutions are made based on the availability of ingredients.  This became starkly evident in researching recipes for an apple custard tart.  I recently inherited a couple of my mother-in-law's cookbooks.  The oldest book was Good Cookery By W.G.R. Francillon and G.T.C.D.S.  This book was originally published in 1920, but was revised at the start of the second world war. This reprinted version was from 1948; a time in British history when rationing was at it's most severe level.

IMGP0147

Unfortunately, this old volume was not much help in providing a classic apple custard tart recipe, but certainly gave some context to how events like, war, social and economic policy, and resource management can dictate (more that one would expect) what we eat.

The next book on the shelf was The Constance Spry Cookery Book, 1956.  This is a massive volume of post-rationing recipes and cooking techniques that clearly draw on the expertise of classic French and continental European cuisine.   This book was issued to students of the Winkfield Place finishing school and Cordon Bleu Cookery School.  In reading through some of the recipes, it seems to reflect a hopefulness and celebration of better times; a sentiment shared by much of the world in the 1950's.  In addition, it does, most excellently, provide a superb apple custard tart recipe called Tarte Normande.

IMGP0140

 Here is an adaptation of Tarte Normande (providing a more specific ingredient list):

Tarte Normande

Adapted From The Constance Spry Cookery Book, 1956

IMGP0163

Ingredients:

1 Recipe for short crust pastry

1 lb Fruit (apples, gooseberries, etc.)

1 oz Butter

1 oz Sugar

Cream:

1/2 oz Flour

1 gill of milk or cream (I used approx. 6-8 oz of cream)

1 Egg

1 oz Sugar

2 Tbs (or more) of DOM B&B Liqueur

Method:

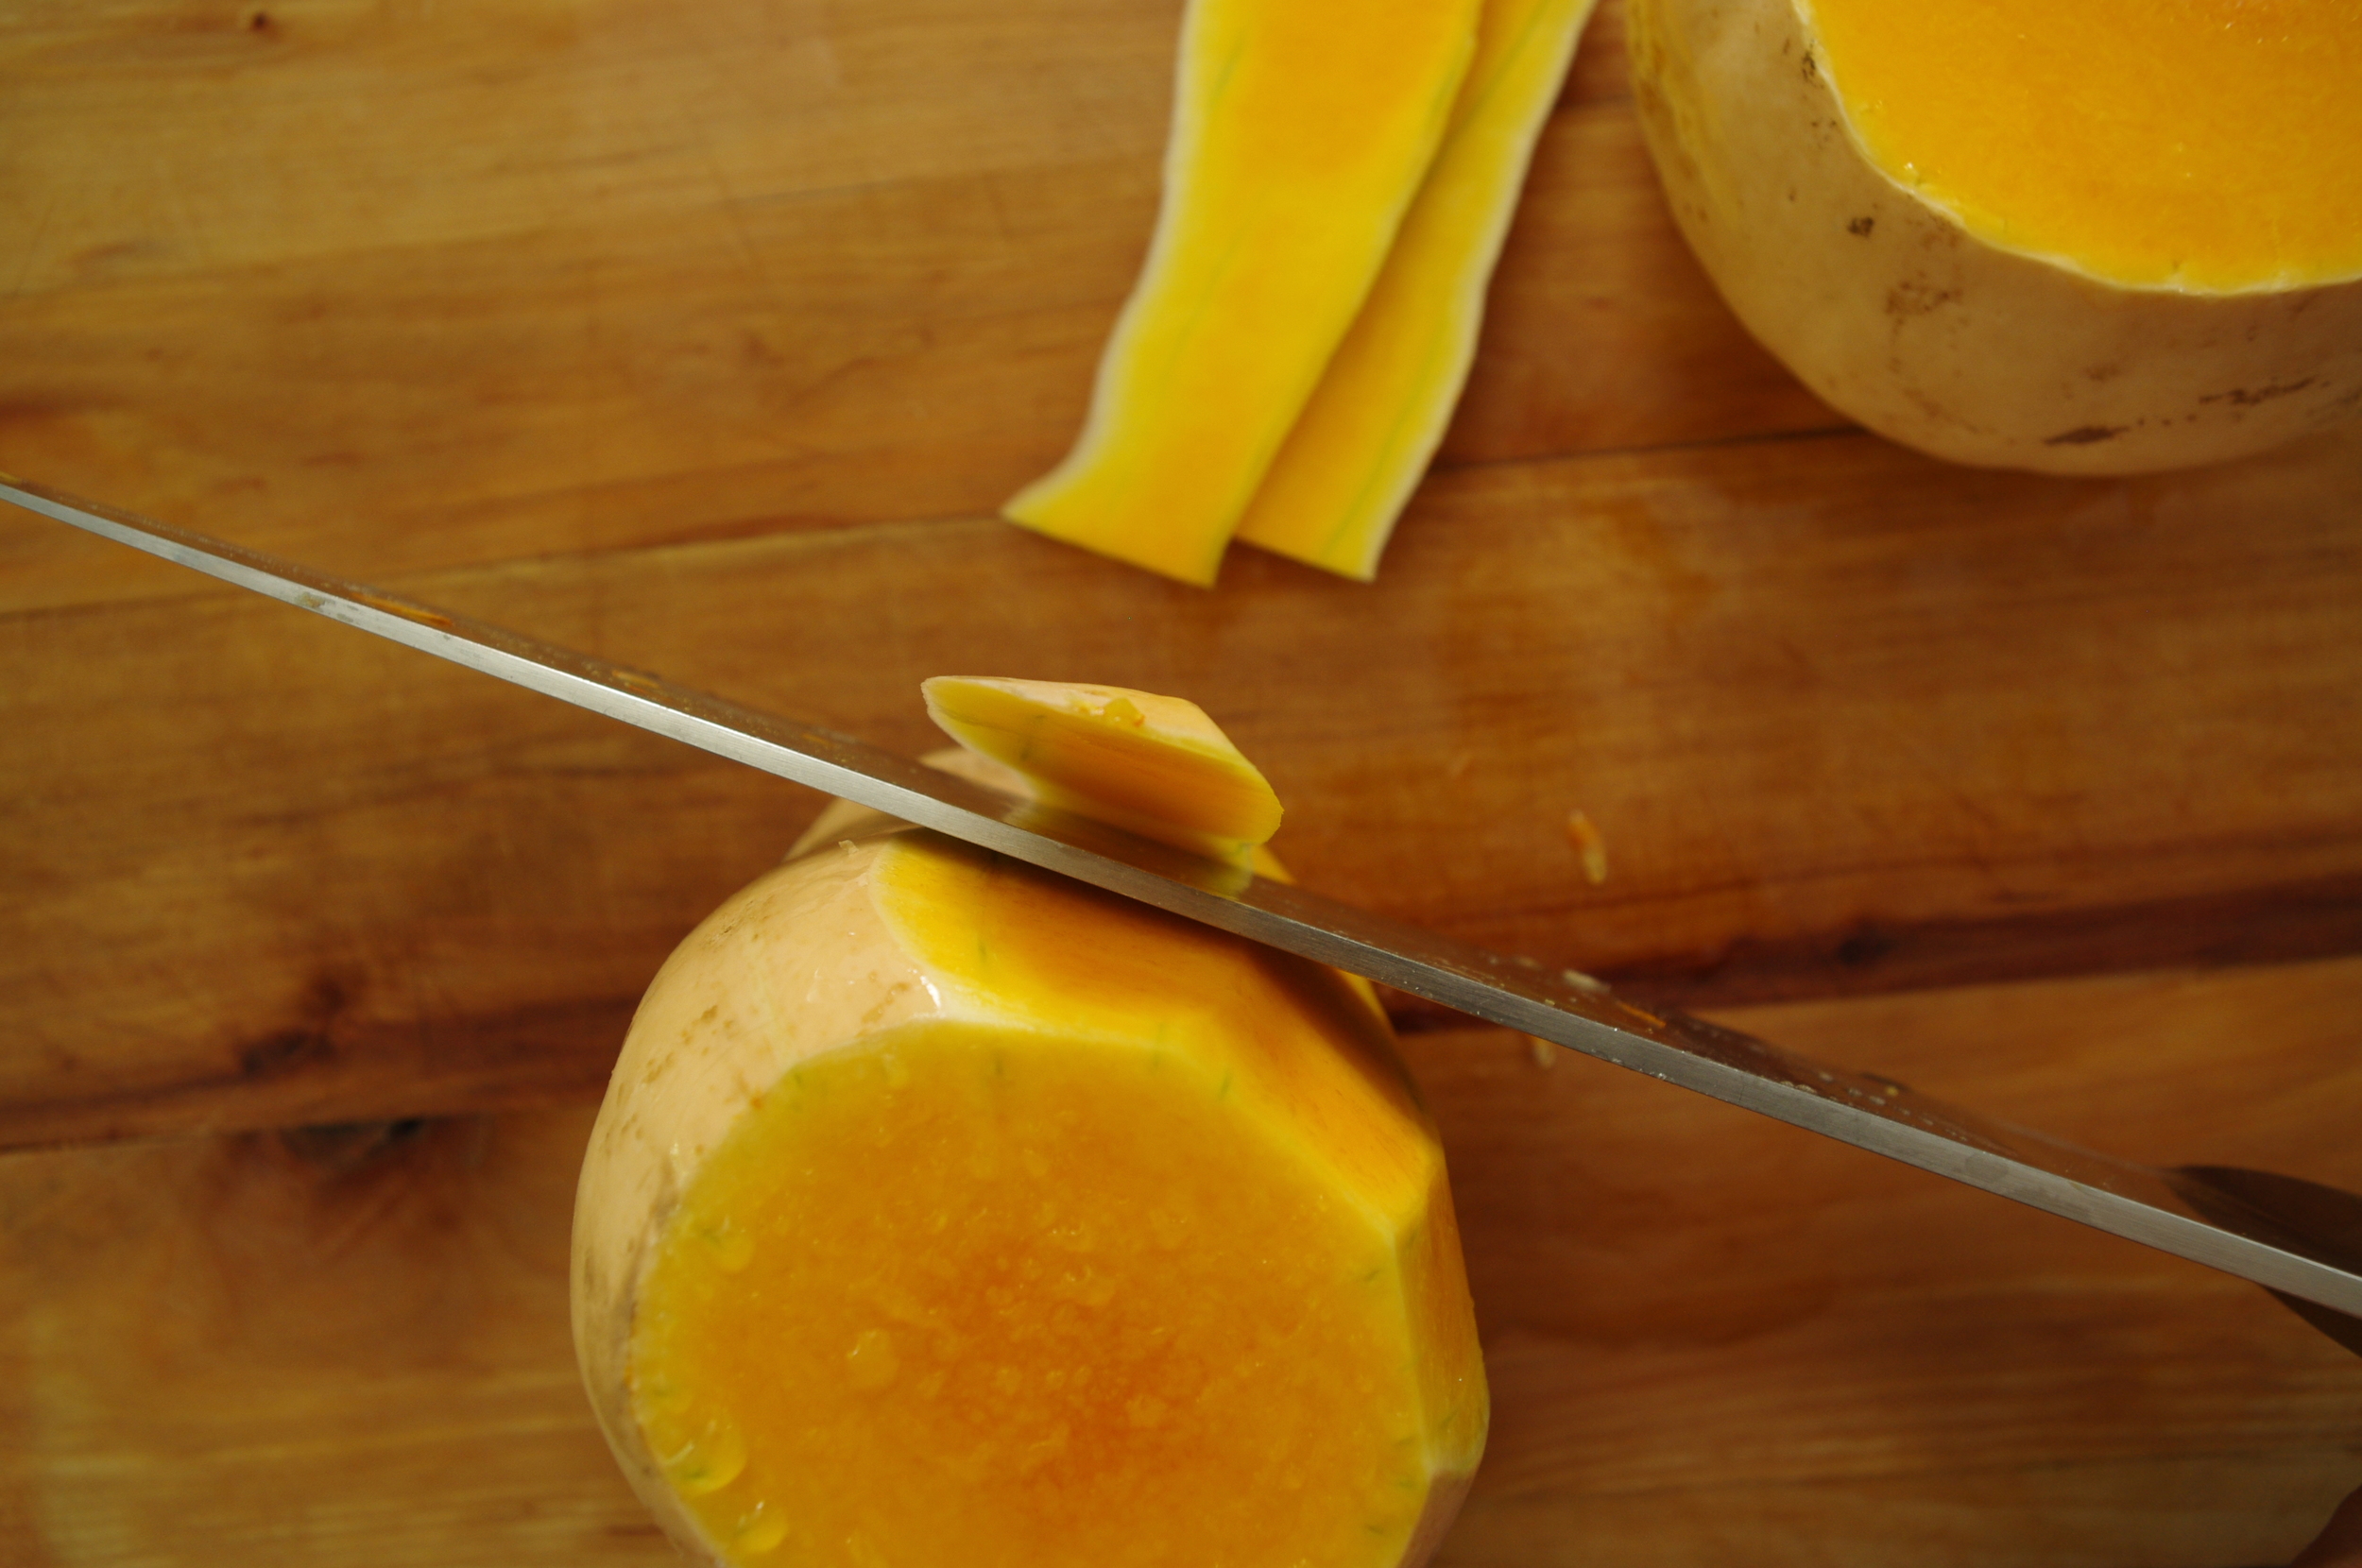
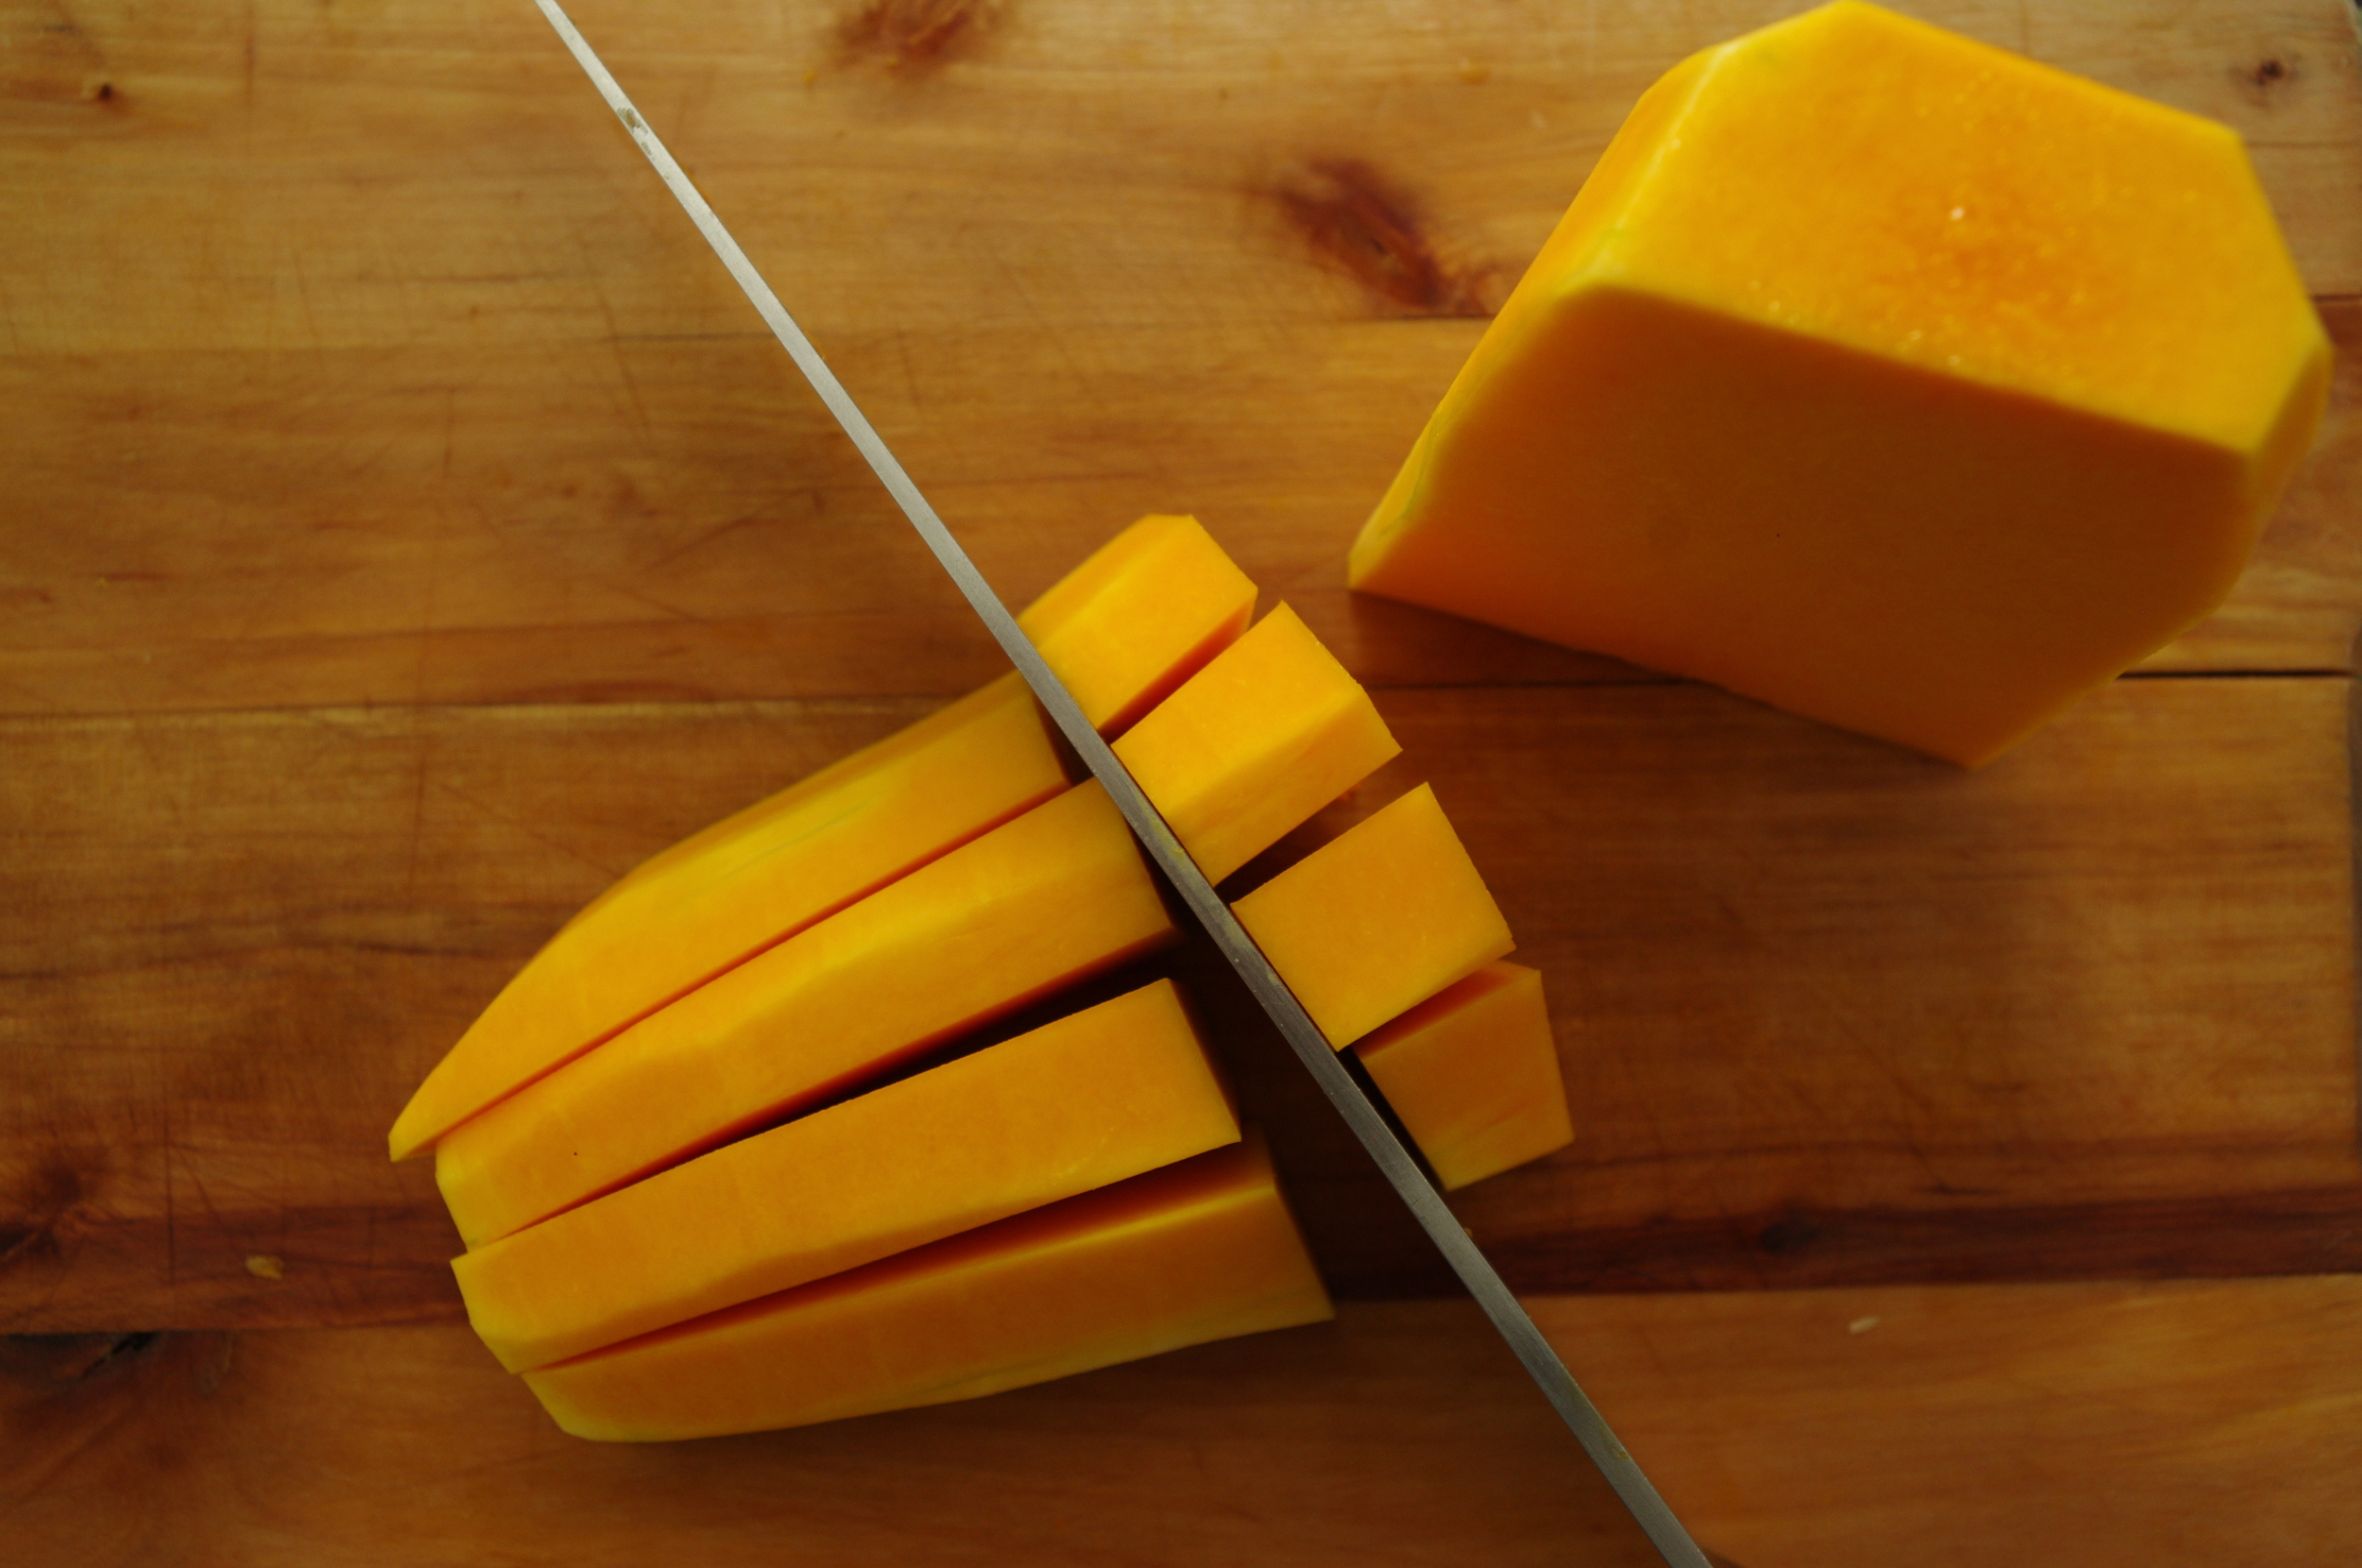
Line a 10-inch flan ring (or spring-form tart pan) with pastry. Make sure there are no cracks in the pastry and that the slices of the flan are high.  Peel, core, and cut the apples into thin slices, then set aside.

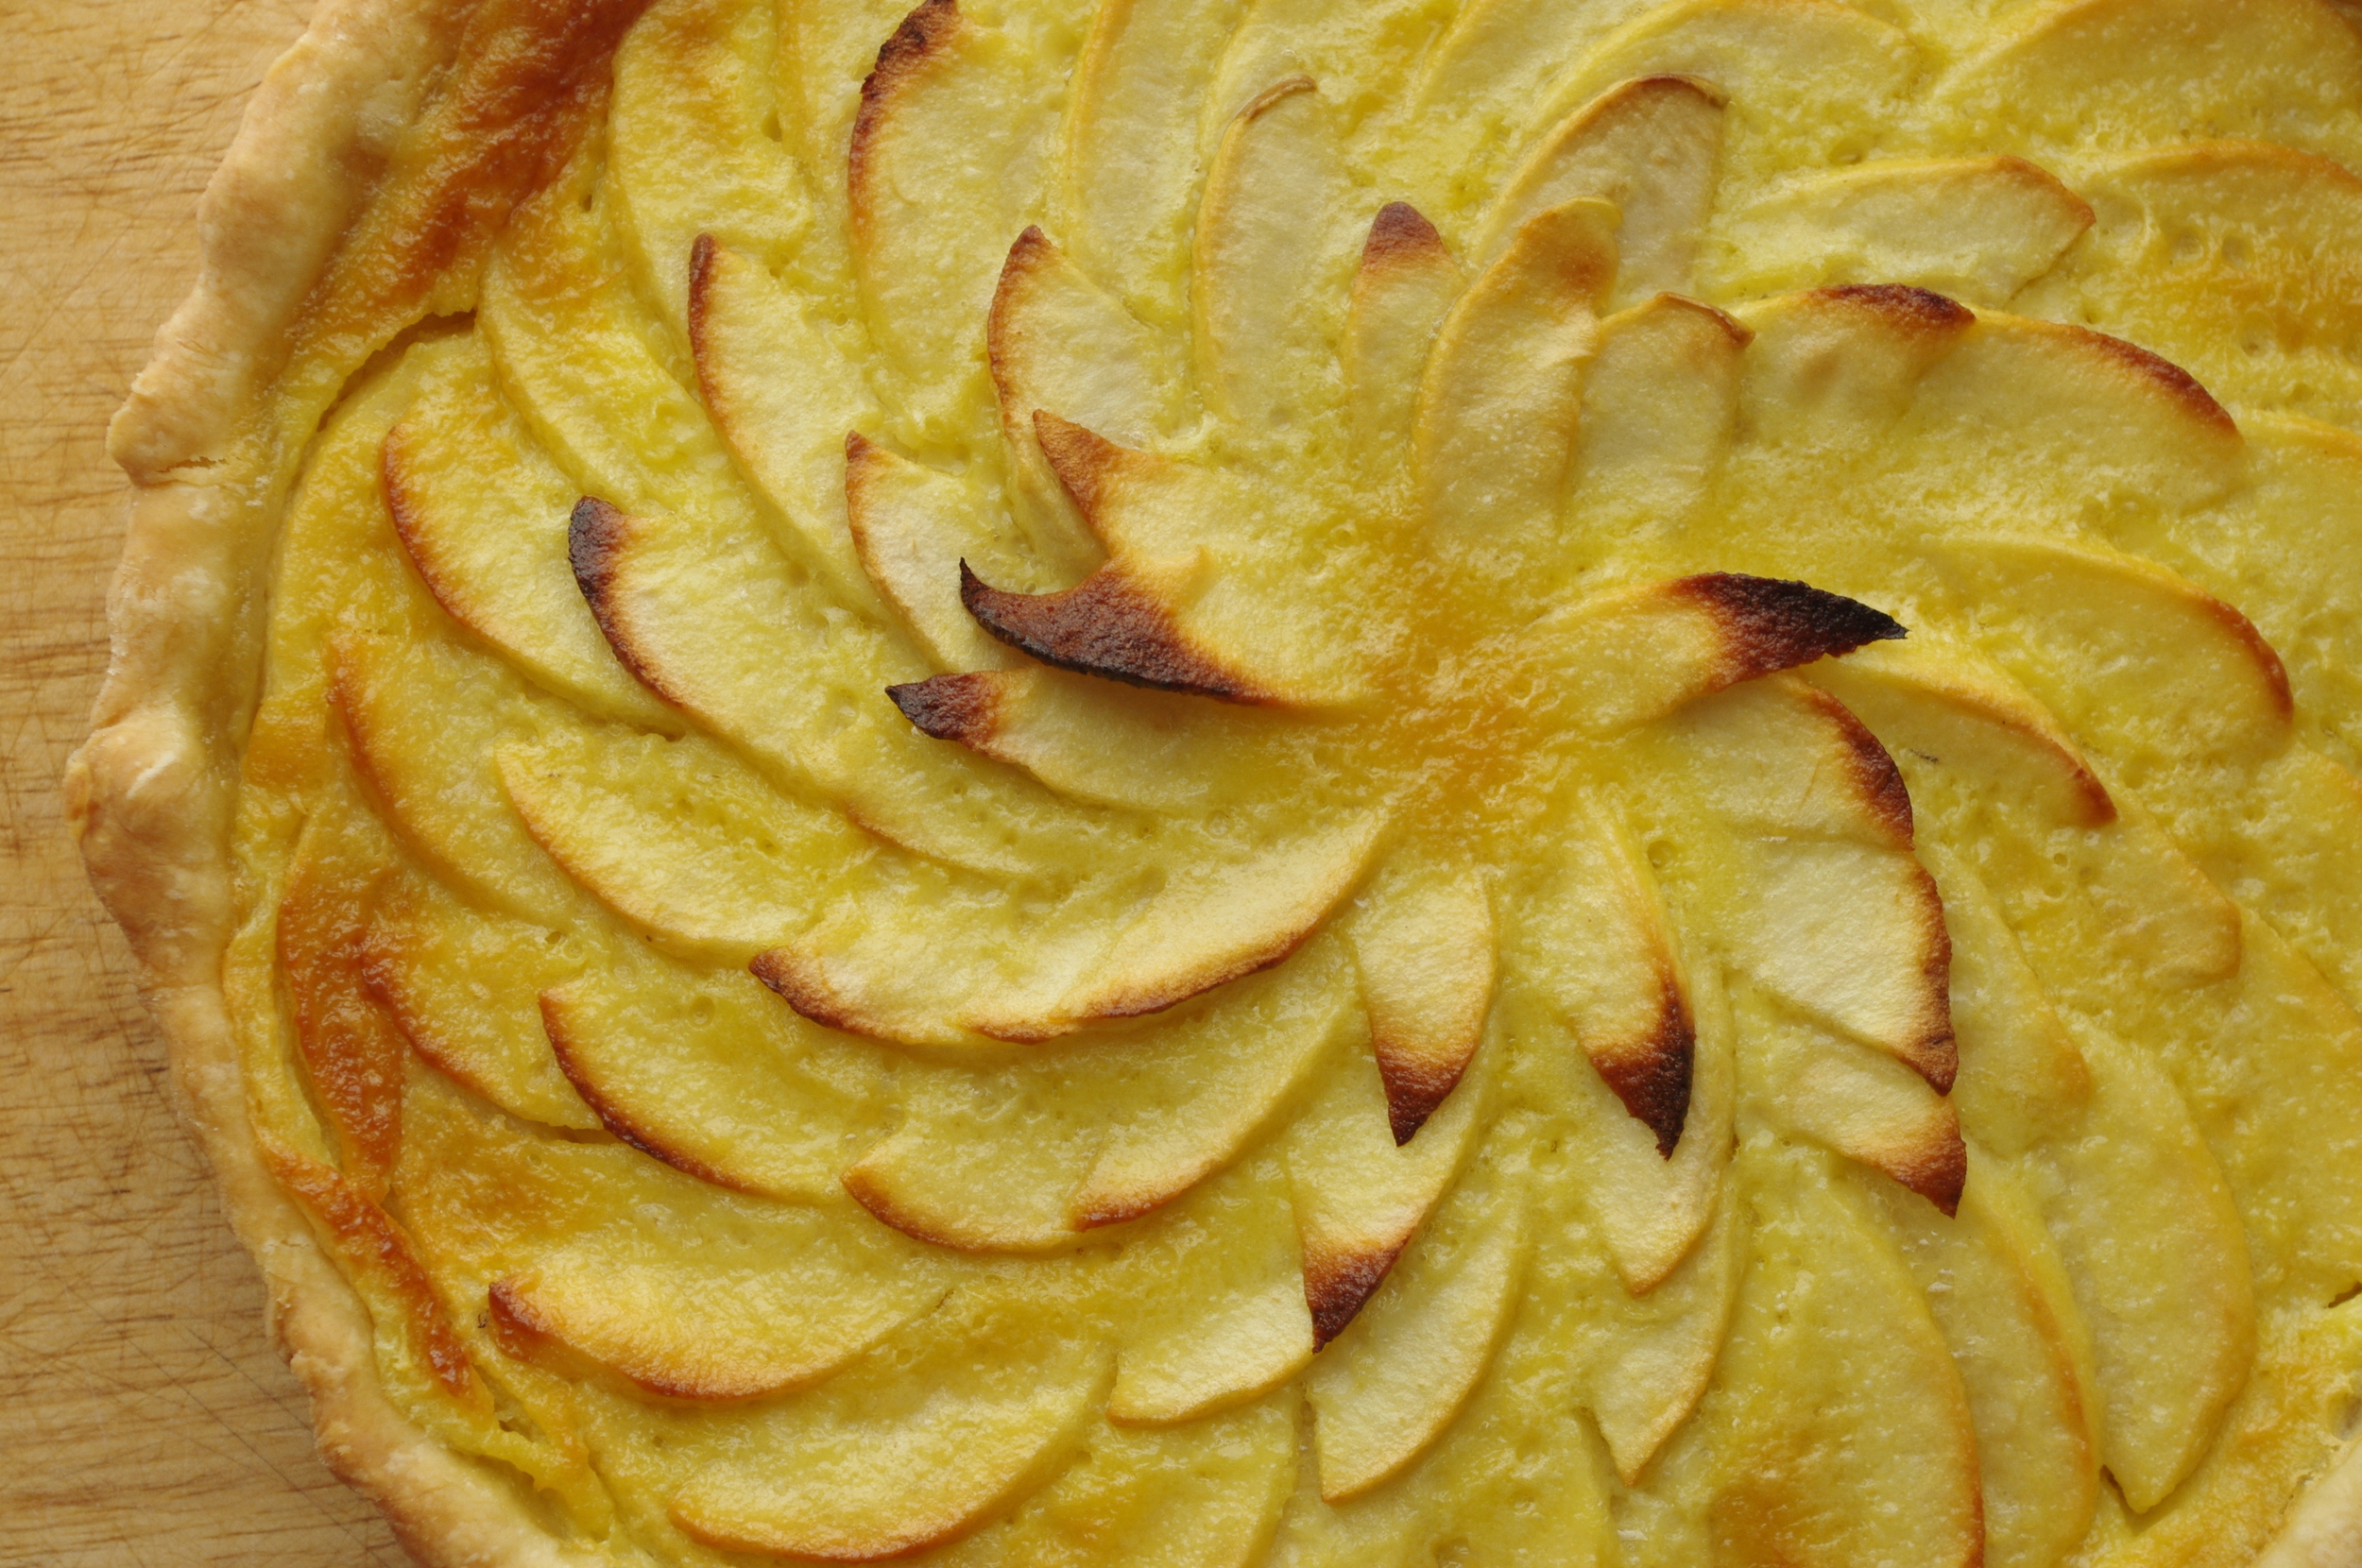
Place the butter in a saucepan with 1 oz of sugar and a tablespoon of the liqueur.  On medium heat, stir the mixture until it becomes bubbly and begins to darken in color. Spread the caramel mixture into the bottom of the pastry. Arrange the apples in a fan pattern inside the pastry.

IMGP0149

Whisk together the flour, egg, 1 oz of sugar, cream, and liqueur.  Pour over the apples.  Bake at 375 to 400 degrees for about 40 minutes, or until the tips of the apples darken, and the custard has risen and just set.

~~~~~

In an effort to compare modern versions, an online search for similar recipes produced a plethora of adaptations.  It would seem that our present culture has not only ready access to ingredients produced throughout the planet, but the privilege to customize recipes to our specific health and dietary needs.  Here is a delicious gluten-free/Dairy-free adaptation which appears to be the most common special-diet trend at this time:

Apple Custard Tart

(gluten and dairy free)

IMGP0128

*Crust:

1 1/2-2 cups Almond Flour

1/4 tsp Salt

2-4 Tbs Coconut Oil

1-2 Tbs Honey, Pure Maple Syrup, or Sugar

1/2 tsp Vanilla

1 Egg

Preheat oven to 375 degrees.

In a medium bowl, mix salt into almond flour. Combine wet ingredients in a separate jug or bowl, then mix into the almond flour with a fork.  Add more almond flour, if necessary, to form a dough that is not crumbly and not too sticky.

IMGP0124

Divide the dough into four equal parts.  Press evenly into the bottom and sides of four 5-inch tart pans, taking care to not have any holes or parts that are too thin.   Alternately, you can make one larger pie in an 8-inch pie plate or tart pan.

Place the blind crusts in the oven and bake for about 8 minutes, or until they begin to darken in color and are slightly more firm to the touch.  Remove from the oven and let cool.

Filling:

2 Apples (about 1 lb)

Juice from 1 lemon

dash of Cloves

dash of Cinnamon

1 large Egg

1/2 cup cold-pressed unsweetened Coconut Milk

2-4 Tbs DOM B&B Liqueur, or similar flavored brandy

1 Tbs Honey, Pure Maple Syrup, or Sugar

Method:

Peel apples, then divide into 8 wedges.  Cut away the core from each wedge, then slice the wedges thinly (about 1/8th of an inch thick). Place the apples in a bowl and gently toss with the lemon juice and spices. Take care to not break the slices.

IMGP0125

Place the apple slices into the prepared crusts, arranging them in an overlapping circle around the edge of the tart base. Then lay the slices in a fan pattern, with the tips of the slices going from the center to the edge of the pan. Pour about 1/4 cup of the custard mixture over the apples. Place in the oven and bake for 25 minutes, or until the apples darken on the tips and the custard has risen and just set. Remove from the oven and let cool for 15 minutes. Remove the tarts from the pans and serve warm.

*Thank you to CSA member Oriel Wiggins for sharing this delicious Gluten-Free/Dairy-Free pie crust recipe. 

Zesty Grilled Vegetables

IMGP9871.jpg

Grilling or cooking over a barbecue is perhaps the oldest and most primitive cooking method.  It does not have to be complicated, but getting to know your fire-source is probably the the most important step.  It can be as simple as building a wood fire, letting the logs burn long enough to turn into hot, white-ash covered coals, and sticking a cast-iron or metal barbecue grate over the top.  Using charcoal briquettes can be even more simple than a wood fire, and gives a distinct flavor that is desired by many. However, many backyard barbecue enthusiasts prefer the instant heat of a gas-fired grill.  Whatever your preference, once the grill is nice and hot, it won't be long until you have deliciously grilled vegetables ready for your favorite meals.

Ingredients:

(Any of the following vegetables, or whatever you have on hand)

Eggplant, sliced into 1/4 to 1/2 inch slices

Zephyr or Pattypan Squash, sliced into 1/2 inch slices

Sweet Peppers, seeded and cut in half or into thick strips

Green beans, stems trimmed

Delicata squash, seeded and sliced into 1/4 inch slices

Canola oil

A good quality lemon-pepper seasoning blend (like The Alchemy LP)

(or a mixture of fresh lemon zest, minced garlic, thyme, freshly ground black pepper, and kosher salt)


Method:

Wash, trim, and slice vegetables.  Place in a large bowl and drizzle enough canola oil on them to lightly coat the vegetables.  Too much oil can cause oil drips and flare-ups on the grill, not enough oil will leave the vegetables too dry.  Generously season with the lemon pepper mixture.

IMGP9863

Heat your barbecue to a high heat (about 500-550 degrees).  If using charcoal, let coals burn until they are white, smokeless, and very hot.  If cooking over a wood fire, follow this method from Oliver Schwaner-Albright.

Place the vegetables on the hot grill.  Resist the urge to move them around a lot.  Let the first side sear long enough to make dark brown or black grill marks before turning to cook the other side.

When the vegetables have seared on both sides, remove from the grill and return to the bowl.  Toss in the remaining oil and seasoning before serving.  Garnish with fresh herbs, like basil, parsley, or cilantro if desired.  Serve hot or cold.


Fire Roasted Peppers

IMGP9839.jpg

Roasted sweet peppers are a commonly found for sale in jars or cans for about $6/16oz.  Organic roasted peppers can be even more expensive.  Making your own fire-roasted peppers, however, is exceedingly easy and inexpensive.  Preserving is easy by canning them in jars with water and citric acid, or just pack them in freezer-proof containers and freeze portions for the winter. I used a hot barbecue grill for this recipe, but you can hold them over an open flame on your gas range, or on a baking sheet under a broiler.  The main point is to use high heat to blacken and blister the skins of the peppers.  This flavors the meat of the peppers, while also allowing the skins to separate easily for removal.

Here's how:

Heat grill to a high heat (about 550 degrees) Place red, yellow, or orange sweet peppers on the grill, turning to blacken all sides.

IMGP9824

Remove from heat and immediately place the peppers in a plastic or paper bag. Alternately you can put them in a bowl with a lid.  Allow the peppers to steam for a few minutes, or until they are cool enough to handle.

IMGP9829

When the peppers are cool enough to handle, gently rub the skins away from the peppers and discard.  Remove seeds and stems as desired.  Use in recipes, or freeze.  Let cool completely before freezing.

IMGP9839

Winter Squash: How to prepare for recipes

IMGP9555.jpg

These fall beauties are not to be relegated to the tabletop as decorations.  They are meant to be peeled, chopped, roasted, steamed, or pureed.  Though they are not related, imagine them as large carrots or beets with thick skins, if you will.  Members of the winter squash family are delicious, naturally sweet, and full of dietary fiber, vitamins and minerals. If picked fresh from a green vine they would have a high starch content and less flavor.  Properly "cured" winter squash is left in the field until the vines have died, the stems have dried and hardened, and the squash skins have thickened.  The curing process continues after the harvest by leaving them in a dry window or counter top long enough to develop thicker, darker colored skins.  In this process the starches convert to sugars and the flavors become complex. Though the naturally thick, waxy skins are sometimes difficult to remove, they serve to preserve the squash for months on end.  If stored in a well-ventilated, dry place, and protected from getting cracks and bruises, they will continue to be delicious throughout the winter. Cool, but not cold storage is required, so feel free to decorate your kitchen while you are saving extras for the winter months.  Click here for more information about the curing process.

Some winter squash have thinner, more edible skins.  Delicata squash, for example, does not generally last as long as a butternut squash or pumpkin, but the skins are lovely and soft when cooked. Although natural sugars are a highlight to winter squash, they are perfect additions to a variety of both sweet and savory dishes.

There are many ways to prepare winter squash for recipes, and how you choose to prepare them may depend on the variety or the recipe.  Before you begin, a couple of helpful kitchen tools to have are: 1) A sharp, good sized cooks knife or santoku knife.  2) A non-slip cutting board.  


Squash Puree: Three Ways (commonly used for muffins, cakes, pies, custards, etc.)

IMGP9562

Baked (Best method for acorn or other deeply ridged squash):

Cut squash in half lengthwise.  Scoop out seeds with a spoon.  Brush cut sides with a little oil and place cut side up or down (up to dry the squash more, down to caramelize the edges and have a more wet puree). Bake at 400 degrees for 45 to 90 minutes or until the squash begins to shrivel and is soft when the fork is inserted.  Remove from the oven and let cool.  Scoop out the squash, or pull the blistered skin away from the pulp.  Discard the skin. Place the squash in a blender and puree to the desired texture.

IMGP9569

Steamed:

Cut ends off the squash, then cut in half crosswise.

IMGP9565

With the widest cut side down, remove the skins by carefully slicing from top to bottom, working your way around the sides. When the skins are removed, scoop out the seeds and discard.

IMGP9566

Cut the squash into 1/2 inch cubes.

IMGP9568

Place the squash in a steamer basket inside a large sauce pan.  Put 1-2 cups of water in the bottom of the pan and cover with a lid.  Turn heat to medium-high and steam until the cubes of squash are soft. Remove from heat and let cool.  Puree with a blender to the desired texture.

Roasted:

Follow directions above for removing the squash skins. Cut into 1/2 inch cubes. Place on a baking tray or large casserole dish and coat with a little oil. Sprinkle a little kosher salt and dried spices on the squash and bake in the oven at 400 degrees for about 1 hour, or until the edges turn dark brown and caramelize a bit.   This method will produce the driest result, but the most flavor. From here you can mash, puree in a blender, or simmer in another liquid like milk, juice or broth to re-hydrate before turning into a puree. Caramelizing the squash adds richness and concentrated sweetness, allowing you to reduce any added sugars (if any) to your recipes.

IMGP9573


Now that you have your squash puree, here are a few tasty winter squash recipes for you to try:

Moroccan Spiced Red Lentil Soup

Ann Keener's Butternut Squash Galettes

Coconut Butternut Squash Pie

Roasted Butternut Squash Baked Custard

Butternut Squash Buttermilk Waffles